
WHAT IS SCREEN PRINTING?
Screen printing is the best and fastest process for printing into garments plus other products and definitely the most affordable when it comes to large quantities. Just like with a stencil, the screen printing technique consists of pressing ink through apertures to create a printed design onto a huge variety of surfaces and materials. Also known as serigraphy, serigraph printing or silkscreen, this form of decoration is a great way to personalize your products. It’s a very basic process that has unlimited outcomes. Is the most common and widely used form of decoration in the industry and currently accounts for over half of the apparel decoration activity in the US.
How does it work?
The basic idea of screen printing consists of transferring a design onto a mesh screen stretched across a frame. So after placing the product under the screen, we press ink across the screen with a rubber blade or squeegee either manually or by a machine. Consequently one color at a time onto the product. Finally, we need to cure the ink. Every piece dries by air, UV lights or with high temperatures.
What are the applications of screen printing?
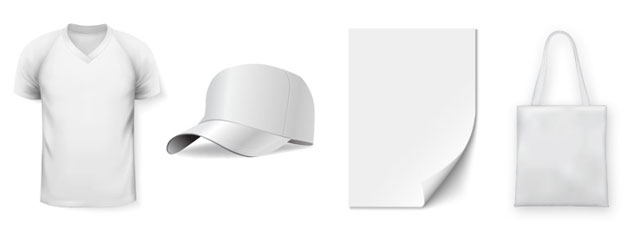
One of the great benefits of screen printing is that we can apply it to almost any material. The most common are fabric and paper. If you own a t-shirt with a design on it, you’re probably wearing a screen print. As well as artistic uses on paper, it has a range of exciting commercial applications and promotional items. Products like mugs, bottles, cups, mouse pads, hats, flags, signs, display stands, towels, bandanas, bags, etc. We can also use it in a miniature level on high-tech things like circuit boards and medical devices.
Can I screen print any type of image?
There is the misconception that screen printed graphics need to be bold, simple and can’t have much detail. But we can now easily achieve highly detailed multi colored prints like full color photographs or artistic illustrations. We can get the same resolution and vibrant look as a DTG with longer durability and at a lower cost.
THE BENEFITS OF SCREEN PRINTING:
- Better pricing and faster than DTG, heat transfer or sublimation on long runs.
- It’s easy and cost effective so the more you print the less expensive it becomes.
- You can adapt to your budget. Screen printing offers the flexibility of choosing different options that will reduce cost and still achieve great results.
- Works on a wide range of surfaces and materials.
- More vibrant and vivid colors for your designs.
- The inks used in screen printing are more durable and better quality.
- You can choose different types of inks for different materials, finish and look.
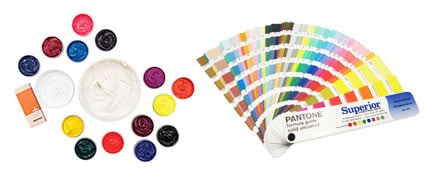
- Screen Printing lets you match any Pantone color.
- You can explore different options by manipulating the screen printing process and achieve custom results.
- You can do it yourself. With the right materials and tools, you can screen print at home.
THE PROCESS
Technically speaking the serigraphy process consists of transferring ink through the openings of a mesh onto a substrate. It passes through apertures of the mesh except in areas made impermeable to the ink by a blocking cured emulsion. These apertures define the shape of the design to print. A squeegee moves across the mesh while applying pressure to fill the open mesh openings with ink. This causes the ink to wet the receiving surface after the squeegee has passed.
We print one color at a time so we need several screens to create a full color design. Proper screens registration is crutial so all the colors lay in the exact same position and match the original design. After printing all the colors we need to cure the ink. Different materials and inks require different methods. We then cure the inks by exposing them to UV lights or high temperatures to adhere properly to the container.
Below we’ll explain in detail the whole process required to achieve the perfect screen printed product in this 15 steps…
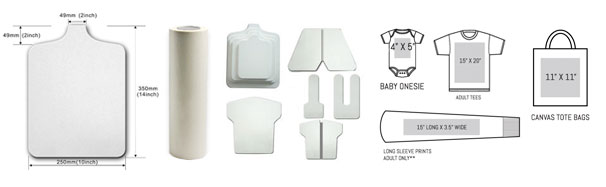
SELECT YOUR BLANK OR SUBSTRATE: Product, Material, Surface, Shape, Placement, Size and Quantities.
ART PREPARATION: Scanning, Resolution, Vectorization, Color Separation.
PRINT FILMS POSITIVES: Targets, Output, Halftones, Angle.
CHOOSE YOUR OF INK: Plastisol, Water Base, Discharge, Specialty.
SELECT YOUR SCREEN AND EMULSION: Mesh#, Shape & Size, Emulsion Type.
“BURN” THE GRAPHIC ON TO THE SCREEN: Placement, Exposure.
PREPARE INK: Color Mix, Pantone Match, Quantity.
SET UP SCREENS FOR PRINTING: Tape Edges, Press Set Up, Registration.
SELECT SQUEEGEE: Size, Hardness.
PREPARE PALLET OR SUPPORTING SURFACE: Glue, Targets, Marks, Wedges.
START PRINTING: Angle, Pressure, Technique.
CURING: Air Dry, Oven Cure, Stacking.
FINISHING: Grouping, Folding, Bagging, Tagging, Cleaning.
SELECT YOUR BLANK OR SUBSTRATE:
The first thing we need to decide is on what are we going to print. Different materials, inks, size and placements will require different types of screen, mesh and emulsion. So we need to define what is the product we want to decorate. Make sure we use the right tools prior to production and get the best results without complications.
If we want to print on a shirt for example we need to define:
1. Style:
Tanks, hoodies or tees have very different sizes, cuts, shapes and materials. This will give you more decoration possibilities or limitations.
2. Color:
Dark colored shirts will require an undercoat of white plastisol ink or the use of discharge inks.
3. Material:
Different fabric materials like cotton, polyester or rayon need different types of ink. This will define the mesh count, the emulsion and the inks to use.
4. Placement, shape and size of the print:
Different sizes, shapes and placements will require different screens and pallets. The position of the graphic on the screen will also change. If the prints are small you can burn several graphics in the same screen. The more decoration placements on your product the more time it has to go under the press. This will require more time and materials.
5. Quantities:
Defining quantities will help determine the amount of ink needed. Also the time and energy to complete the full run.
ART PREPARATION
1. Convert to a digital format:
If your art is in a physical form we need to scan it or take a high quality picture. Once it’s a digital image we can manipulate it with software. Make sure that you scan the image at a minimum resolution of 300 DPI at the actual printing size. You can also get great results with a high definition camera with plenty of light and a tripod. Save and provide your files as JPG, PNG, PDF, TIFF or AI.
2. Size, Resolution and Adjustments:
Before making adjustments and separating colors we have to make sure that the art print size is at a 100% and at 300 DPI resolution. Increasing the DPI resolution of a low res image won’t improve the quality of your image. Most of the images you find online are low res and not optimal for printing. Make sure that your graphics look crisp and clean even when you zoom in at the actual print size. For better results we want the design to be high-contrast and free of pixelated edges. If you don’t know how to do this Psylo Graphics can help you make your graphics look sharp and ready!
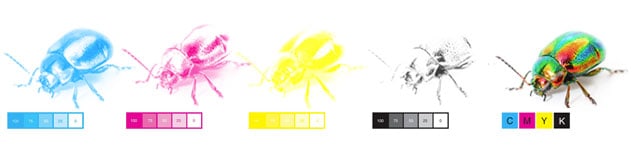
3. Color Separation:
You need one sheet of film and one screen for each color of your image. We have to separate all the colors of your design and output them as 100% black. Achieve grays and gradients by using halftone dots. Mixing these patterns with the color of the substrate or other inks create new tones and colors. There are different color separation techniques depending of the art and final look desired. The most common ones are spot color, halftone, 4 color process and index color separation. Psylo Graphics offers free color separations with every order.
PRINT FILMS POSITIVES
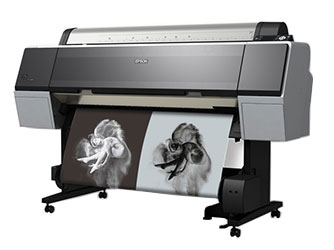
Film positives are reusable transparent sheets we use to print the designs using an inkjet printer. The design needs to be as dark as possible, so that it blocks light from the exposure unit to the areas behind the design. We add crosshairs or targets to the corners of multiple color designs so that we can align the screens properly and have proper registration. It’s also important to include the name of the color with the targets so you can label each screen easily.
After we burn the screens and register them we can block the targets and color information with tape or emulsion so they don’t become part of the print. With certain rips and apps we can also control the patterns, size, angle and shape of the dots that will create the halftones and gradients of the design. This lets us create different looks or optimize the image for the screen mesh count or ink that we’re using. After we transfer the image present on the film positive to the screen we can store the films and use them again and again for future runs.
CHOOSE YOUR INK
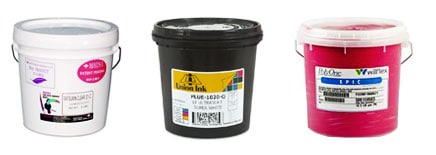
Before we can get our screens ready we need to know what type of ink we want to use. There’s a vast range of ink options that have different densities and formulas. This will determine the mesh count of the screen and the type of emulsion to coat the screen with. For example glittery ink is very dense and contains big particles or flakes to create the desired shimmery effect. Therefor we need to use a low mesh count so the particles pass through the openings of the mesh easily.
A finely threaded mesh will block some or most of this metallic ink and the print will look faded. The most common inks used for textiles are plastisol, water base and discharge. For paper, stickers and signs there’s acrylic, vinyl and enamel. There’s a lot of specialty inks that create all kinds of effects and textures. Inks like like glow in the dark inks, gel, reflective, puff, suede, sparkle, high density etc. To learn more about screen printing inks and choose the right one for your project please go here
SELECT YOUR SCREEN AND EMULSION
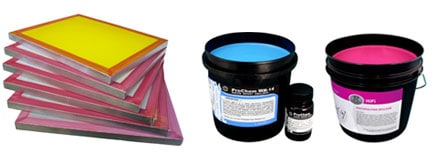
Screens are basically stencils made of finely threaded mesh stretched out and attached to a metal or wooden frame. Synthetic threads are commonly present in the making of mesh for screen printing and polyester is the most popular material. There are also different types of mesh size which will determine the outcome and look of the finished design on the material. The higher the mesh count of the screen, then the higher amount of detail that it can hold.
Before we coat the screen we want to use for our project we need to consider:
1. Size:
The screen needs to be considerably bigger than the graphic to print. You want to have a minimum margin of 4 inches all around your graphic to have comfortable room for the ink, squeegee and flow bar. Screen frames can be custom made at any size, common sizes are 18″x20″, 20″x24″, and 24″x31″, but there are companies willing to make screens to any size needed. It’s recommended to use the same size screen for all the colors in the same set up for easier registration.
2. Mesh Count:
Mesh count defines the quantity of threads crossing per square inch. The higher the mesh count, the finer the threads and holes are in the screen. The most standard mesh sizes are 110 & 156 but in any professional screen shop you’ll find screens with mesh counts from 86 to 355. We use lower mesh count screens for thicker inks like metallic gold, silver, white, etc, as one wants to avoid clogging and lay down more of these inks since they are often printed on dark apparel. Higher mesh count screens are better for process printing, index separations and detailed prints with tiny halftones. A higher mesh also helps prevent bleeding problems with thinner inks.
3. Emulsion:
Emulsion is a photosensitive liquid which has the consistency of honey that we scoop across the mesh and leave to dry for about a day in the dark. This results in a thin coat of gel over the screen that once we expose to light it hardens in the exposed areas but leaves the unexposed parts soft and easy to wash off creating the stencil for the design. We use different types of emulsions for different inks and they have different exposure ranges and exposure times.
COAT SCREENS WITH EMULSION
Once we’ve decided what ink, screen, mesh count and emulsion we want to use for our project, we’re ready to coat our screens. We apply the emulsion on both sides of the screen using a scoop coater, the result should be a thin, evenly spread layer of emulsion. After we coat the screen it needs to stay in darkness in a dark or red lit room just like developing photographs, as any light could start exposing the screen. All moisture needs to be removed from the emulsion. We usually use a fan, heater or a dehumidifier to speed up the process.
“BURN” THE GRAPHIC ON THE SCREEN
1. Placement:
We now place and tape the film positive on top of emulsion-covered screen according to the print placement on your product, the press and the support pallet that you will be using for your run. The idea is to do most of the registration work before aligning the screens on the press so we use rulers and guides to place the designs on the screen in the most accurate way. If the prints are small and you are NOT using discharge inks you can burn more than one graphic in one screen and tape over the ones you are not printing.
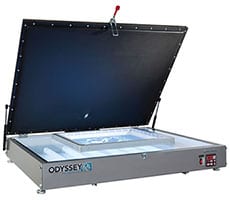
2. Exposure:
Once we place the film positives properly on the screen in a dark environment we need to expose them to bright light. At Psylo Graphics we use a professional high wattage metal halide bulb exposure unit to achieve the best results and get most of the graphic details but you can use any source of UV light, bulbs designed for growing plants or even the sun. The time of exposure changes depending of the emulsion and the intensity of the light is exposed to. It can range from 1 minute to 45 minutes.
WASH OFF UNEXPOSED EMULSION AND DRY
Immediately after the exposure time is complete, we need to remove the film positive carefully. Wash the screen with a low pressure shower or water spray. The emulsion on the unexposed areas to light will be still soft and wash off easily. This results in a proper stencil in the mesh making the areas permeable to ink.
The exposed emulsion areas to the light will harden into the screen. These areas are impermeable to the ink. After wasing off the soft emulsion we’ll see the negative image coming out on the screen. We leave the screens out in the sun for a few minutes to dry off and harden the remaining emulsion.
PREPARE INK
While the screens are drying in the sun we can start preparing the ink. At this point we should have already decided about the type of ink and color we want to use. We calculate the amount of ink based on the size of the screen, the size and shape of the design and the quantity of items and amount of hits to print. You want to have enough ink to keep the screen flooded but you don’t want to have too much left over specially if you are using discharge inks because we can not store them.
For large runs it’s best to prepare the ink in batches for easier handling and better control of the mix. We want to mix the ink very well so it’s soft, chunk free and at the right temperature. This way it goes through the mesh smoothly without clogging. We mix the colors to match what we see on the digital version of the design or a Pantone color number. Ink colors can change slightly after we apply to the substrate and cure them. So you want to make sure that you do a few tests on the actual product you are printing.
SET UP SCREENS FOR PRINTING
1. Tape edges and other unwanted apertures:
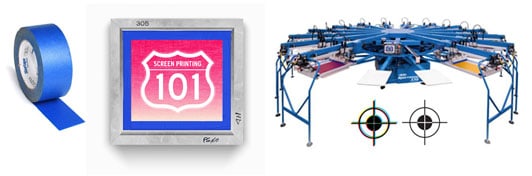
Once the screens are completely moisture free, we tape the edges with a glue residue free tape (like painter’s tape) to reinforce the border between the emulsion and the frame of the screen. All areas of the screen must be completely impermeable to the ink except the stencil area with the design to print. We block the targets and other small unwanted apertures in the screens with more emulsion or tape.
2. Press Set Up:
There are a number of different presses, including manual and automatic styles. At Psylo Graphics we use automatic rotary 10 color carousel presses, as this allows several different screens to work at once. For multi-colored prints we use this sort of printer to apply the separate color layers in quick succession. Print ready screens are now clamped on to the press in order following the right sequence for your print. We print flashed under-bases (if needed) first, then light colors and dark colors at the end of the sequence. Different sequences can alter the final look of the print and we can play with the order in which the colors are printed to achieve the desired results.
3. Registration:
After the screens are set up in the right sequence and position we need to micro-register the colors using the crosshair targets as a guide and position all the screens in the exact location where all the targets fall on the same place and the colors of the design don’t overlap each other at all. Each color lines up perfect with the next so you end up with one cohesive, flawless design. Several tests on recycled paper or rags might be needed to have the colors perfectly registered and match the original art. Once all the colors are properly registered we are ready to start printing.
SELECT SQUEEGEE
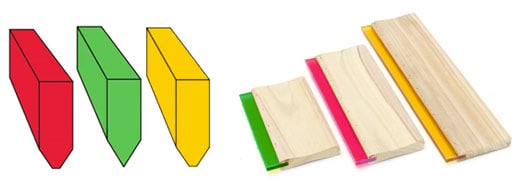
A squeegee is a half inch thick rubber blade inside a metal, plastic or wooden handle. We use it to pull the ink across the screen laying down the paint by pushing the ink through the mesh. They come in many sizes and the stiffness and sharpness of the blade affect the print considerably. One must choose the right length and density to achieve the best results…
1. Squeegee Size:
The length of the squeegee should be a couple of inches smaller tan the mesh screen. We also want it to be about 4 inches wider than the graphic to print, as this will give better coverage.
2. Squeegee Hardness:
Screen printing squeegees come in a few different “durometers”. A metric used for hardness based on the ink type and mesh count of the screen. The color of the rubber usually defines the density and hardness for the screen. Red and orange squeegees are usually softer. Yellow ones are in the middle of the spectrum and then green and blue are the hardest. A stiffer and sharper squeegee lays down less ink than a softer rounded squeegee. When printing less detailed designs or when printing onto fabric, you want to use a softer, more yielding rubber squeegee. A firmer rubber blade is better for printing intricate designs with lots of detail. This ensures all the nooks and crannies in the stencil receive an even layer of ink.
PREPARE PALLET OR SUPPORTING SURFACE
The surface supporting the substrate to be printed is commonly referred to as a pallet and also needs to be prepared before production. It needs to be clean and marked for proper alignment and registration…
1. Coating:
Pallets should be coated with a wide ‘pallet tape’. This serves to protect the ‘pallet’ from any unwanted ink leaking through the screen and potentially staining the ‘pallet’ or transferring unwanted ink onto the next substrate.
2. Glue or Vacuum:
The substrate to print should adhere momentarily to the surface so it stays still and in place during the printing of all colors. This is very important specially for For fabrics a special light transparent glue is applied to the pallet that makes them stick to the surface without leaving residue. A coat of glue should last for several blanks. For paper you can use a light coat of spray glue or some presses come with a vacuum system that sucks the paper against the surface and makes it stay put.
3. Marks Or Wedges:
In order to print your art consistently on the same exact location you want to add marks or wedges to the surface supporting the substrate to be printed. These marks will help you load your blanks correctly every time onto the pallet. You can use laser guides, pencil or tape.
This last action concludes what in the screen printing industry is referred as the “Set Up”, the process which includes all the steps involved in color separation, film prints, screen shooting, ink mix and registration.When this entire process is done each product is printed from the same screen set whether it’s a quantity of one or one thousand. Again, once the set up is complete, it’s easy to print large quantities. So, the more you print, the less expensive it becomes. And, unfortunately, the set up for screen printing is too time-consuming and simply not at all cost effective for small jobs – like one t-shirt or just a few signs. In some instances, you’d pay more for the setup fee than for your order.
START PRINTING
Now that every step of preparation and the press set up has been completed we are ready with production…
1. Pour inks:
Pour enough ink into the screen to flood the whole printing area and have enough ink for a whole batch of prints. It’s more convenient to add extra ink and have some left over than risking not having enough ink for a whole batch and damaging some of the prints with poor coverage. Also keeping your screens flooded and wet avoids the ink getting dry and clogging the mesh.
2. Load blank:
Load your blanks onto the pallet or place on the supporting surface carefully making sure it’s aligned with your marks and that it stays put.
3. Print:
Once the screens and blanks are aligned, the screen is lowered down onto the printing board leaving a small off contact around 1/8th of an inch of space in between the mesh and the blank. The squeegee is then pulled over the full length of the stencil with adequate pressure and angle. This presses the ink through the open areas of the stencil, imprinting the design on the product underneath. The amount of squeegee pressure will affect the results and it will change depending on the mesh, the ink, the substrate and the results you are looking for.
4. Review and unload:
The screen is then lift back up and we can see the print. In the case of multi-colored items, the colors must be applied in individual layers, using separate stencils for each ink. The printed item is removed from the pallet or board for curing and the process is repeated for the whole batch of blanks to be printed.
CURING
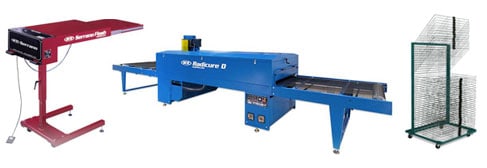
Some inks like enamel or vinyl are dried and cured by air but garments printed with plastisol, water base or discharge inks are run through a large dryer at a specific temperature. This bakes the print onto the item which results in a colour fast product. Carefully remove your product from the platen and set to dry or heat cure. If you’re using plastisol ink it will take about 30 seconds at around 320 degrees Fahrenheit, but follow the instructions provided on your ink bottles. Once dry your custom printed shirts are ready to be worn!
FINISHING
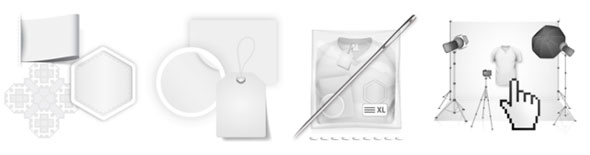
After we cure your items they’re ready for grouppiung and storing. We group apparel in dozens by sizes, colors, styles and printed designs. If you want to have them ready for retail sales we can fold and bag them for you. We can also sew woven labels, patches or decorate with embroidery. Adding size stickers, labels, hang tags or any other type of stationary is also an option. To learn more about about this extra services that we can provide please go here.
When production is over we need to clean up our squeegees and screens. Collect any left over ink and get the press ready for the next batch. Clean and store the screens for future use with the same graphic. If we want to burn a new graphic we need to remove the cured emulsion with special chemicals. Repeat the same process over and over using the same frame and mesh for a very long time.
Contact us today to place an order or to learn more about screen printing!